


![]() Tue Dec 15, 2015 10:05 am
Tue Dec 15, 2015 10:05 am
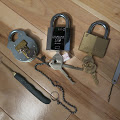
Joystick (T) pin
My old beaut of a dremel — a 25-year old German piece of trusty simplicity — died on me recently (one of the 3-prong pieces are snapped, and the motor is loose inside). I haven’t had the heart to throw it out yet. :S
After a month or so I finally popped down to the local Bunnings — the good ol’ monopolised hardware store — and fetched myself the cheapest entry-level official Dremel (200 series?). Add a table-mounted vise and go-go improvised lathe!
And so, back to making homebrew security pins! This last week’s new plaything have been toying with T-pins, mixing and matching them alongside spools… but also besides each other, alternating them upside-down (using a master wafer to keep it from collapsing into the spring).

(The joystick pin?)
I used a spool and achieved this ^ the other night, and, while it probably has a lot more to do with the binding order, and it’s positioning in the lock (high-cut, #6) it’s a bloody cracker to pick. Uughhh. FFS. Negotiating when that bottom part of the (upside-down) T fully clears alongside everything else (viz., not unsetting any progress) is a damn PITA.
Moreover, I took some photos and after inspecting them figured others might like the pics. (:
---

What the ‘joystick’ pin was made from — a brass (Sargent I think?) spool.

A bunch more, from another challenge lock. #1 is an ASSA Lockwood steel spool (courtesy of mercurial), #2 & #3 upside-down T-pins w/ wafers; #4 small serrated (Sargent?), drilled PiP; #5 standard, drilled PiP w/ a separate top-bar wafer; #6 a large serrated pin, drilled PiP again.

The tips were intentionally rounded, and everything polished, so that it flops around in the lock. I found these pins sit a bit lop-sided (less in tighter-tolerance locks) w/ the spring pressure compressing them against their top wafers, and they can flop weirdly inside their chamber depending on the amount of pressure placed on their corresponding keypins. Altogether, I find round tops work better than sharp 90-degree flat edges.

How it sits, almost ‘assembled’, in the locked-state (master wafers missing on the rounded T-pin tips).
After a month or so I finally popped down to the local Bunnings — the good ol’ monopolised hardware store — and fetched myself the cheapest entry-level official Dremel (200 series?). Add a table-mounted vise and go-go improvised lathe!
And so, back to making homebrew security pins! This last week’s new plaything have been toying with T-pins, mixing and matching them alongside spools… but also besides each other, alternating them upside-down (using a master wafer to keep it from collapsing into the spring).
(The joystick pin?)
I used a spool and achieved this ^ the other night, and, while it probably has a lot more to do with the binding order, and it’s positioning in the lock (high-cut, #6) it’s a bloody cracker to pick. Uughhh. FFS. Negotiating when that bottom part of the (upside-down) T fully clears alongside everything else (viz., not unsetting any progress) is a damn PITA.
Moreover, I took some photos and after inspecting them figured others might like the pics. (:
---
What the ‘joystick’ pin was made from — a brass (Sargent I think?) spool.
A bunch more, from another challenge lock. #1 is an ASSA Lockwood steel spool (courtesy of mercurial), #2 & #3 upside-down T-pins w/ wafers; #4 small serrated (Sargent?), drilled PiP; #5 standard, drilled PiP w/ a separate top-bar wafer; #6 a large serrated pin, drilled PiP again.
The tips were intentionally rounded, and everything polished, so that it flops around in the lock. I found these pins sit a bit lop-sided (less in tighter-tolerance locks) w/ the spring pressure compressing them against their top wafers, and they can flop weirdly inside their chamber depending on the amount of pressure placed on their corresponding keypins. Altogether, I find round tops work better than sharp 90-degree flat edges.
How it sits, almost ‘assembled’, in the locked-state (master wafers missing on the rounded T-pin tips).