Re: Oldfast Impressions
....back to Jeff's Pile-O-Locks.
An old Corbin
Jeff. As you know, lol, I'm an obsessive fuck that's not always pleased with every key.
But I really went old school on this one and I feel like I really nailed it. Hope you like it!
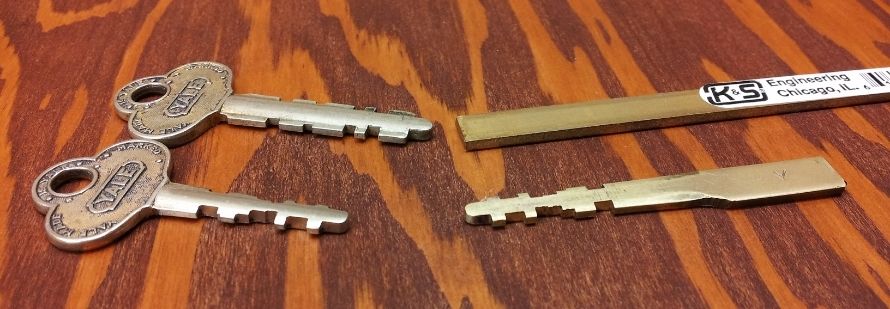
A 3-pin lock that uses ball bearings in the pin stacks. You can see the first pin is inset quite a distance
from the face of the plug. Approximately .370. And although the cylinder seems to have plenty of length,
there's something just behind the last pin that stops the the key. So the first order of business then was
to shorten the key. I also took just a smidge off the bottom shoulder so it won't mark up the lock's body.
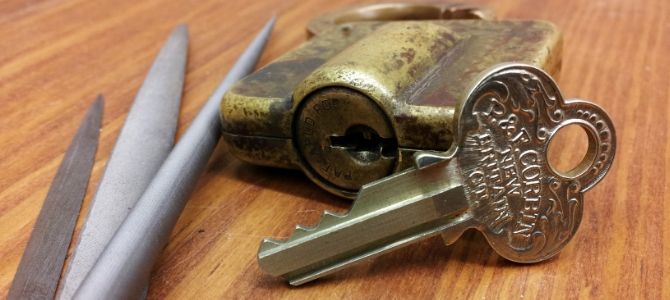
I opted to go with rounded valleys rather than flats. Not only to accommodate the bearings,
but it's kind of an older style cut. The small flat file on the left has always been really helpful
for me when it comes to creating those perfectly straight slopes. It can be done with a pippin,
(in the right hands) but I just haven't quite yet found a knack for it. Not consistently anyway.
 . .
. . 
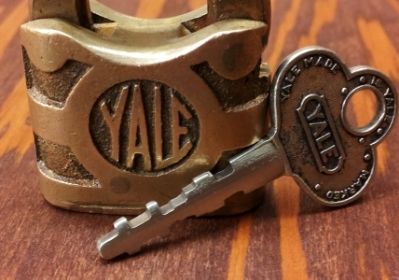
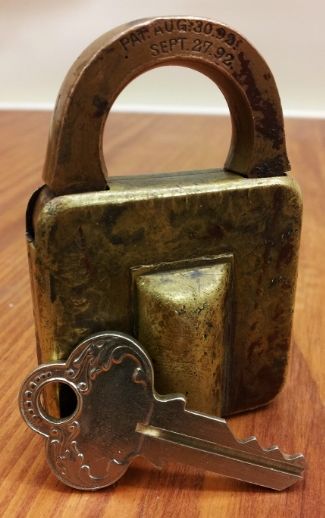
Last thing I like to do with any key is to dress up the leading edge of the tip & slightly round off the peaks.
Helps reduce wear on the pins over time & should make for smooth insertion/removal of the key.
I grab some 400 grit followed up with 2000 for this.
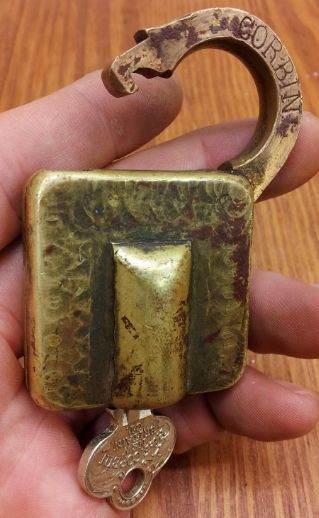
An old Corbin
Jeff. As you know, lol, I'm an obsessive fuck that's not always pleased with every key.
But I really went old school on this one and I feel like I really nailed it. Hope you like it!
A 3-pin lock that uses ball bearings in the pin stacks. You can see the first pin is inset quite a distance
from the face of the plug. Approximately .370. And although the cylinder seems to have plenty of length,
there's something just behind the last pin that stops the the key. So the first order of business then was
to shorten the key. I also took just a smidge off the bottom shoulder so it won't mark up the lock's body.
I opted to go with rounded valleys rather than flats. Not only to accommodate the bearings,
but it's kind of an older style cut. The small flat file on the left has always been really helpful
for me when it comes to creating those perfectly straight slopes. It can be done with a pippin,
(in the right hands) but I just haven't quite yet found a knack for it. Not consistently anyway.
. . Last thing I like to do with any key is to dress up the leading edge of the tip & slightly round off the peaks.
Helps reduce wear on the pins over time & should make for smooth insertion/removal of the key.
I grab some 400 grit followed up with 2000 for this.