


![]() Sun Jul 17, 2022 10:29 am
Sun Jul 17, 2022 10:29 am
Copying a Key by Casting
Decided to try something I haven't done before. making a copy of a key by casting. Have made many things before by casting, usually casting with aluminum using green sand.
Watched a few videos, and decided to make a kit. So here we go.
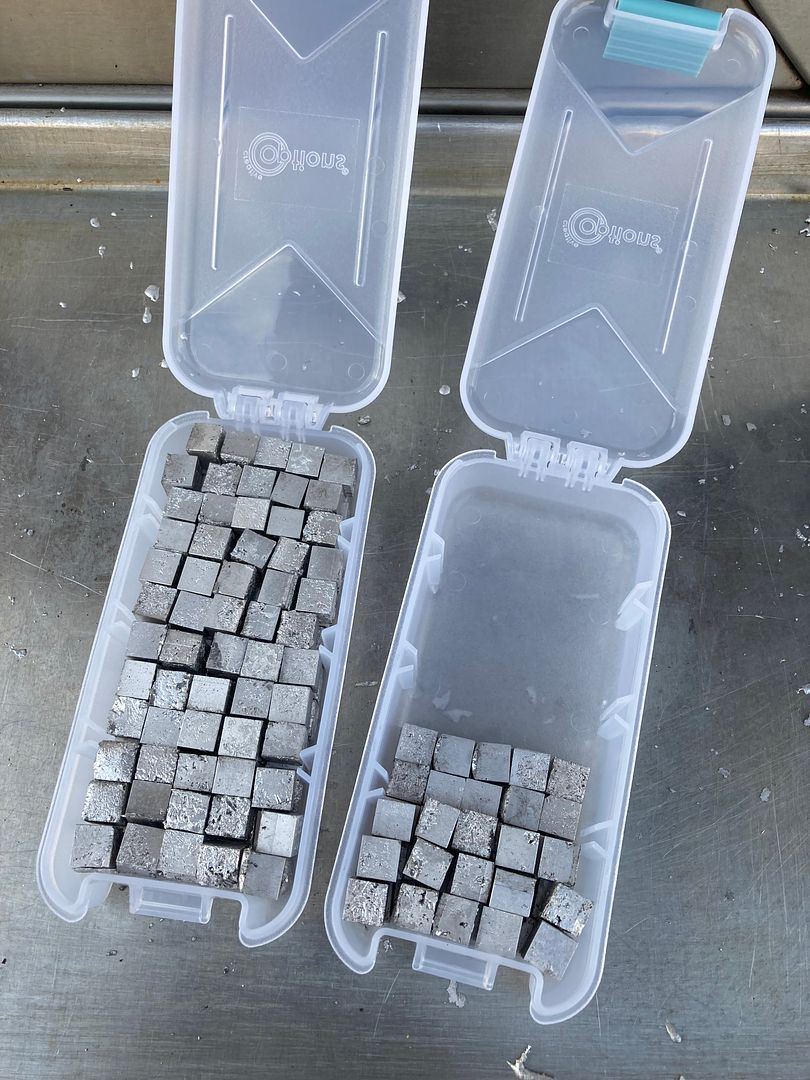
First, get some Woods metal. This is a bismuth alloy that melts at 158 degrees Fahrenheit (70 degrees Celsius). I also have some Rose's metal, which melts at (depending on the exact alloy blend) between 201-208 degrees Fahrenheit (about 94-98 C). Also get a silicone miniature ice cube tray. This makes cubes about 1 centimeter to a side. It is about perfect for casting a key for most normal size keys. The casted keys can always be melted down and reused again.
Go ahead a melt the woods metal into the tray. One tray, even though it is small, will hold about three pounds (1.36 kg) of woods metal.
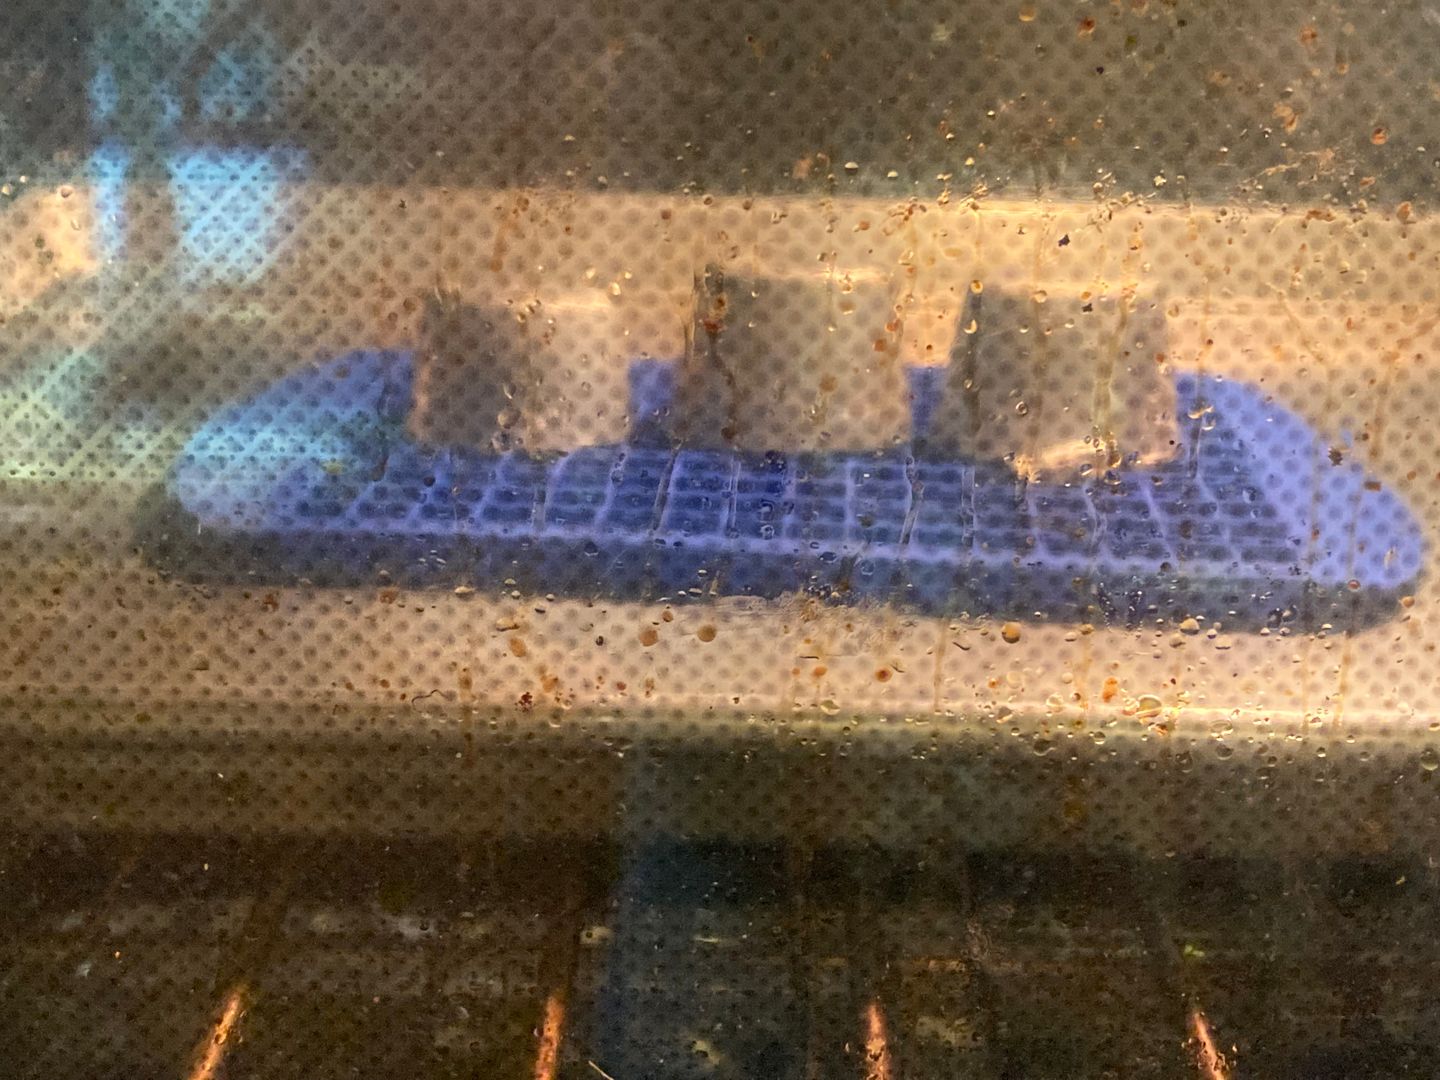
While it is melting, you will need to use something to spread it around so all the cavities of the tray. Then pull it out of the oven and let the cubes cool to room temperature. Then you can pop the cubes out of the tray. I popped them out a little too early, so some of the cubes are a little course and a little of the metal stayed in the tray. Next time will be more patient. Though one tray is enough for LOTS of casted keys.
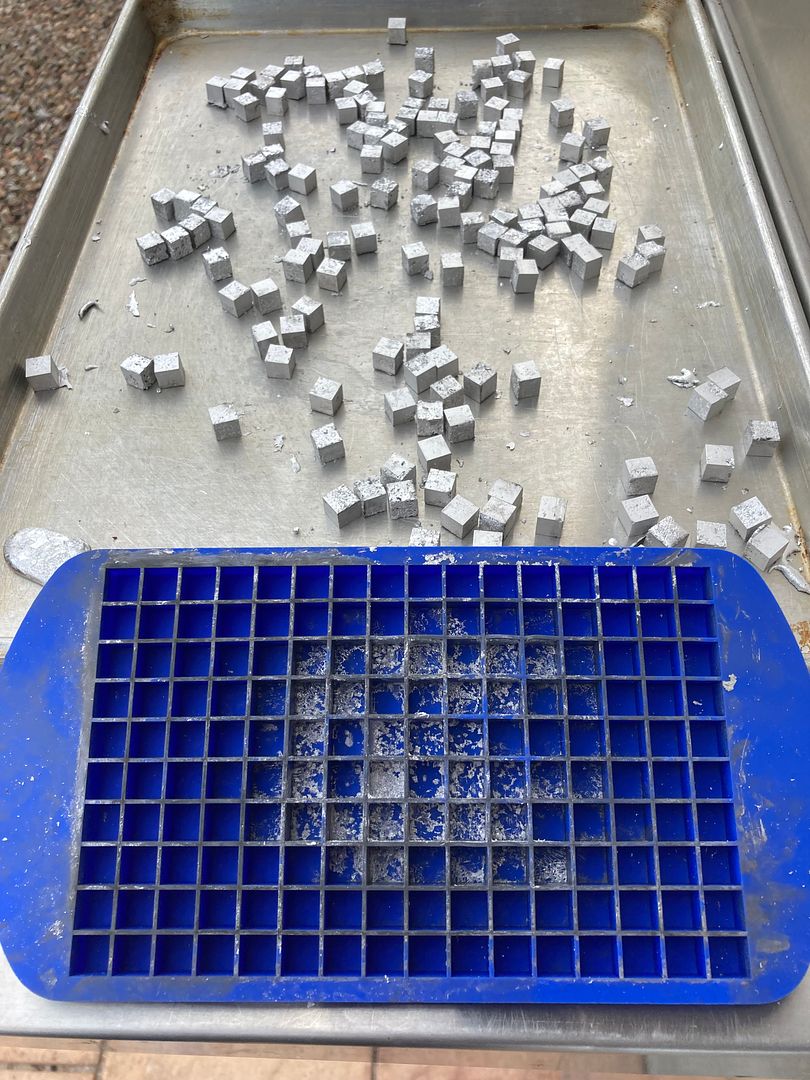
Then when they are cool, gather them up for later use. So much easier than trying to melt a large ingot for a single key!
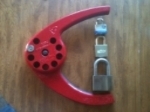
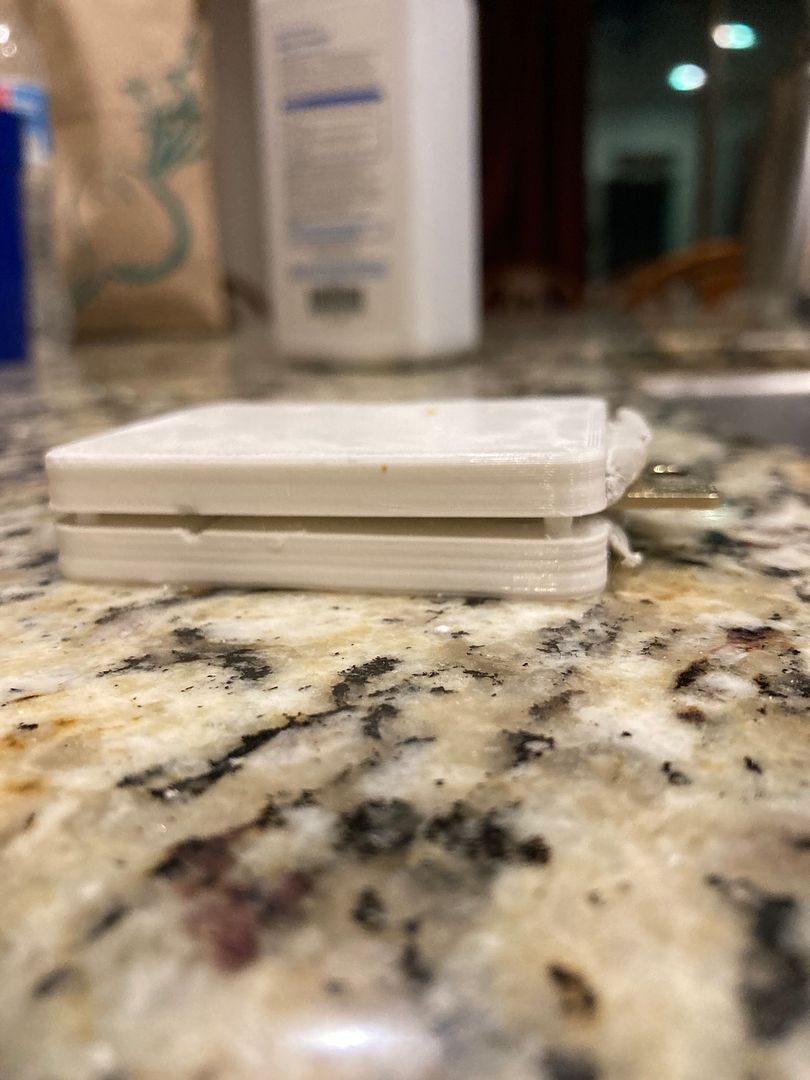
Now we need a clamshell. Printed this one out from Thingiverse. Requires two of them.
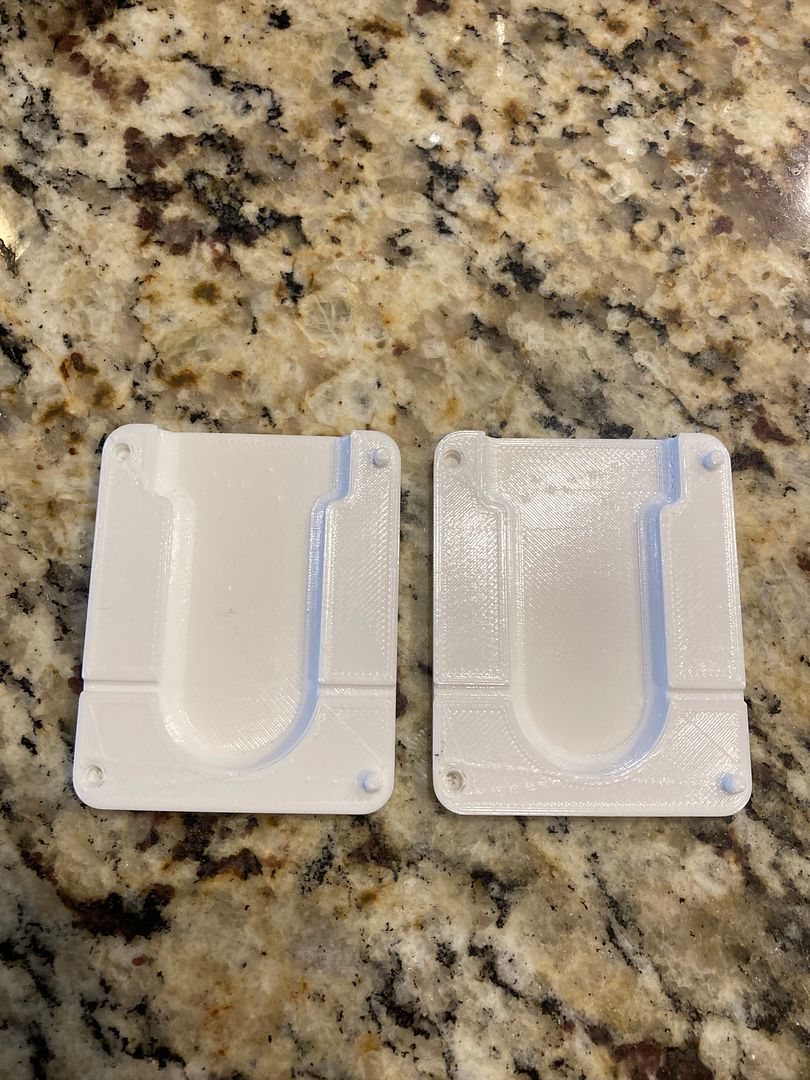
Put the two halves together.
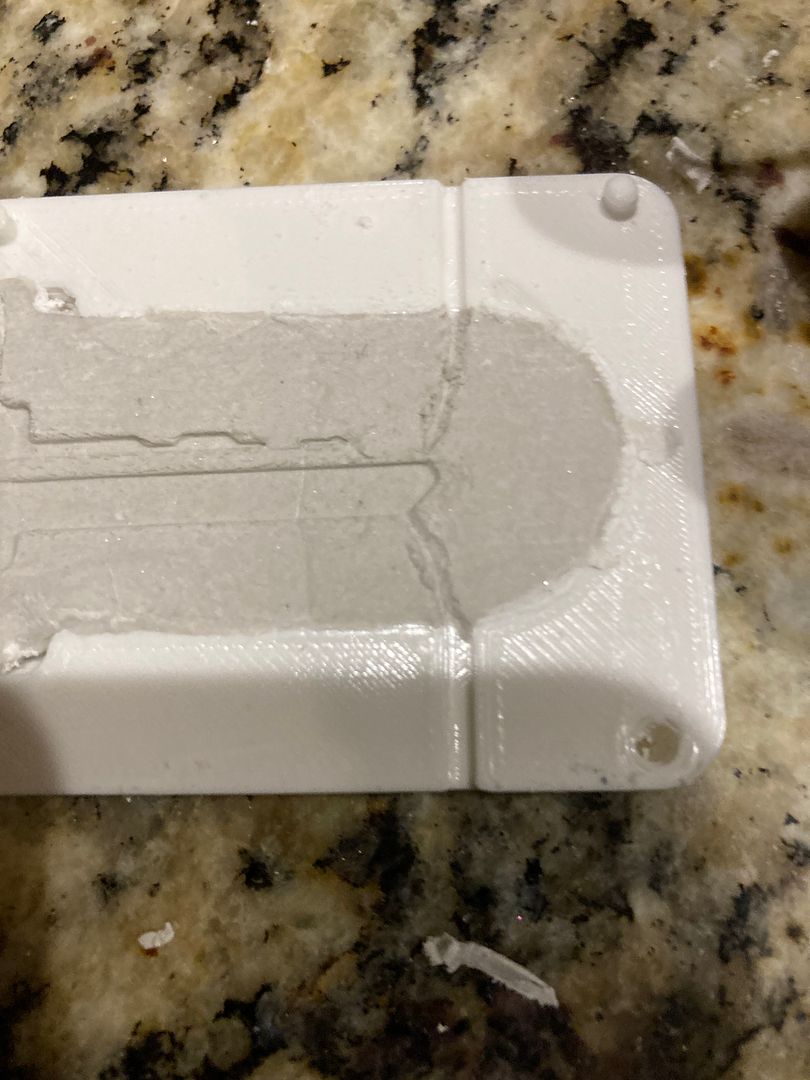
Not ready for use yet. Now fill the halves of the clamshell with clay. I used the handle of the ladle (you will see that soon) to roll the clay flat in the clamshell. Then dust it with baby powder (talc) and use a light brush to carefully brush the dust off so only a little is there to keep the clay from sticking to the key.
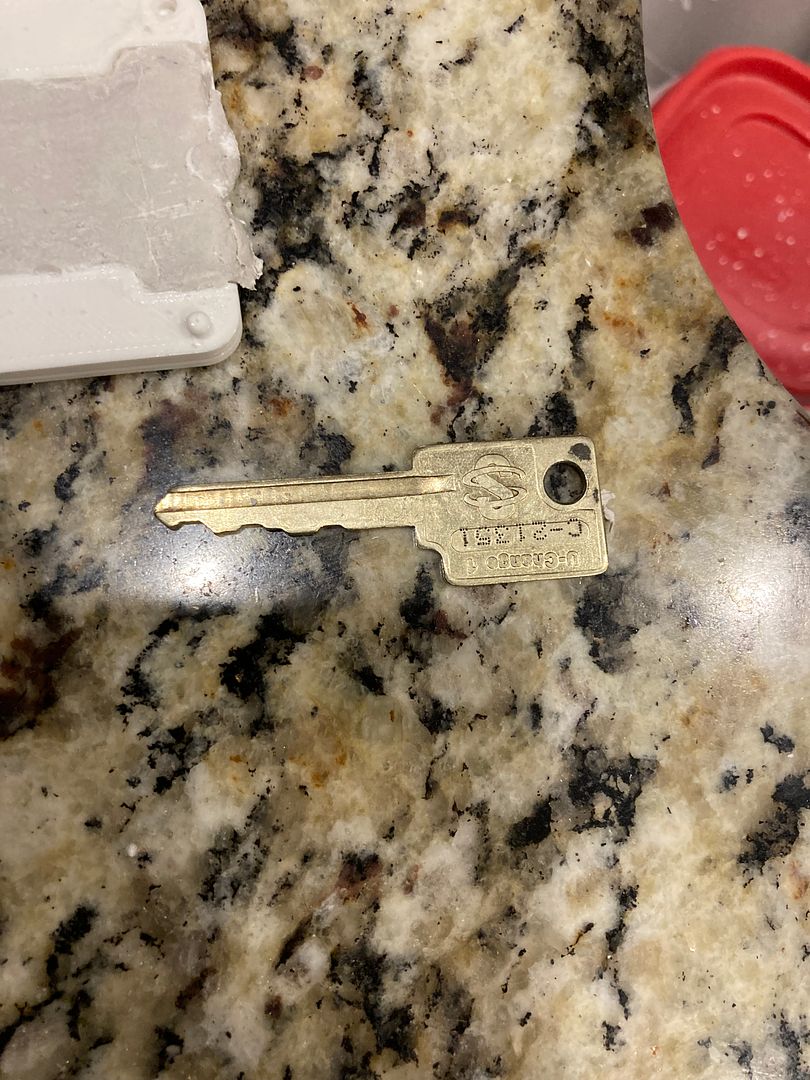
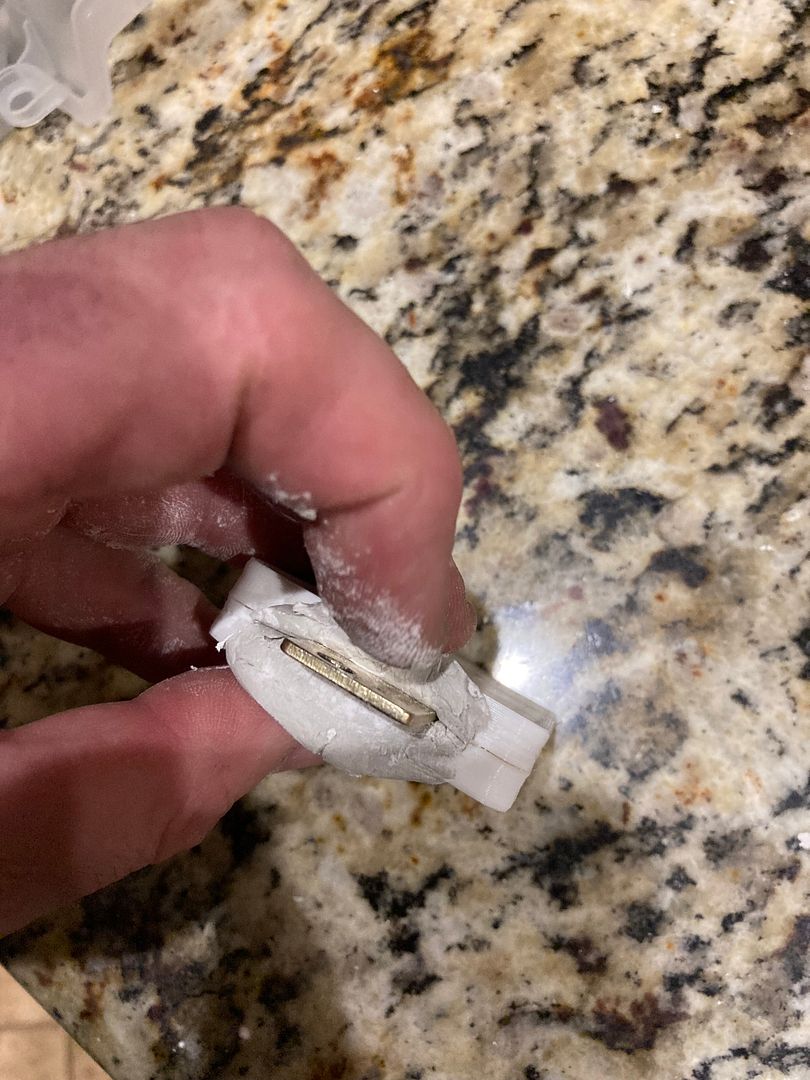
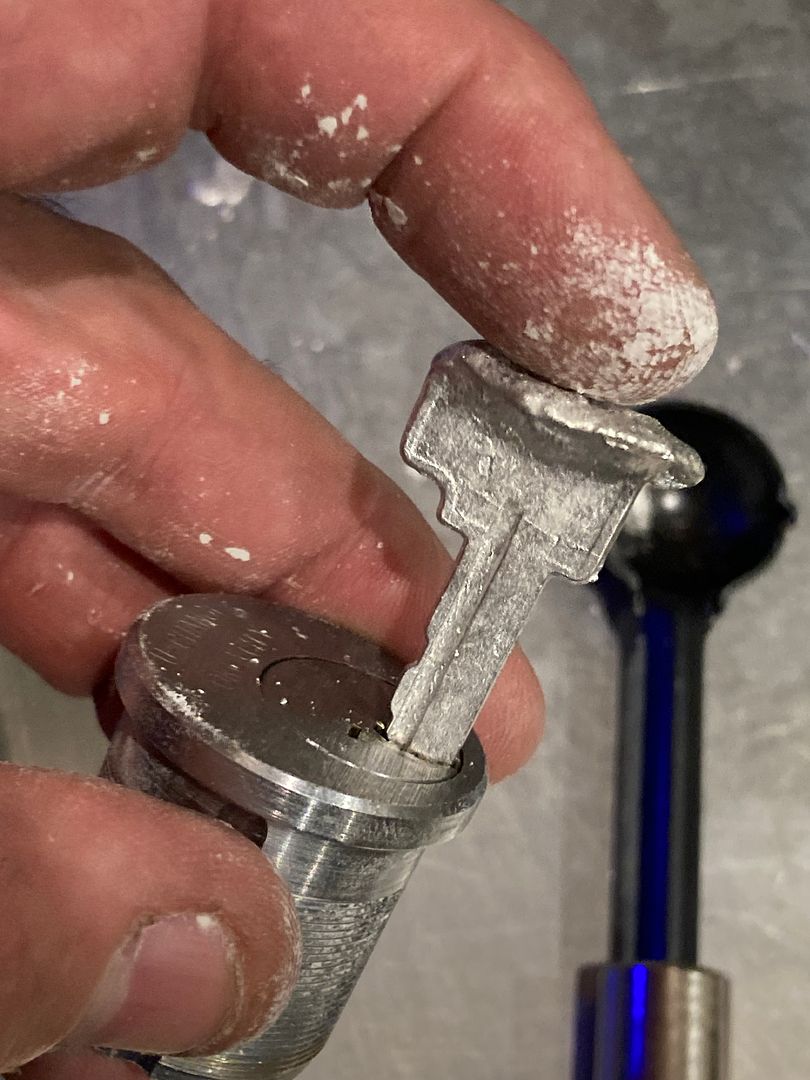
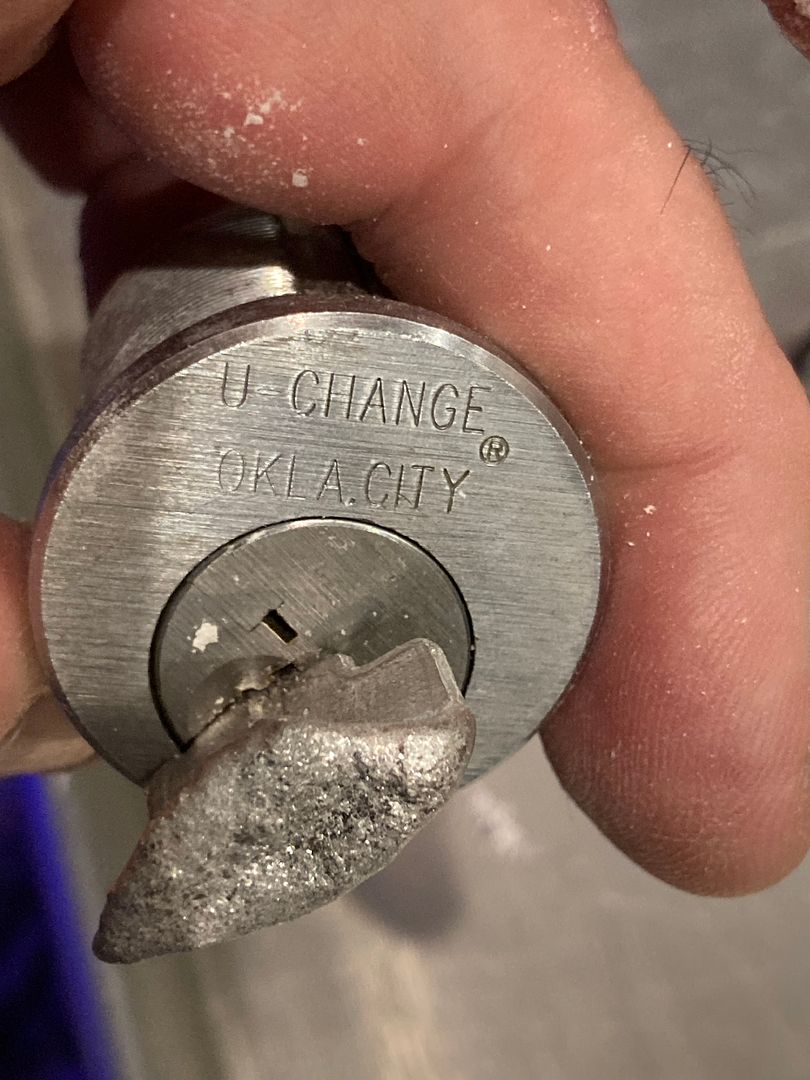
Time for a key! Grabbed the first keyed cylinder to hand, which happened to be a U-Change.
Place it on the clay of one half of the clamshell. You can press it lightly into the clay, but I didn't.

Place the other half of the clamshell on top...
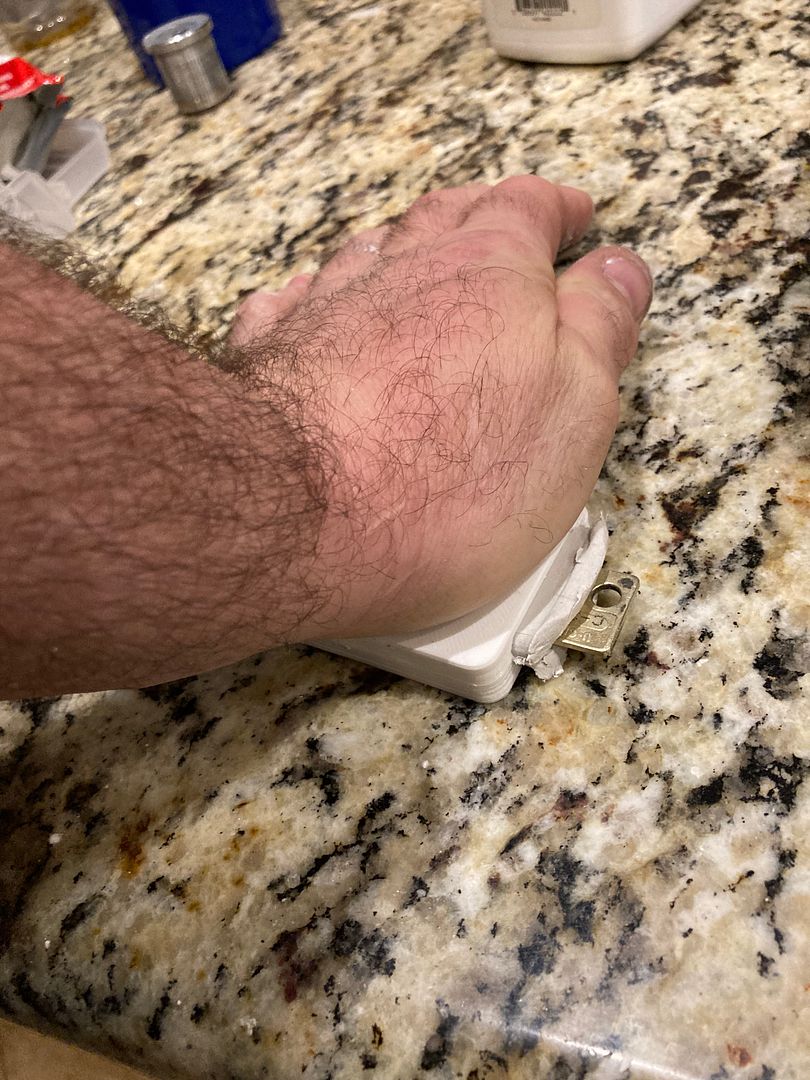
And press the clamshell closed.
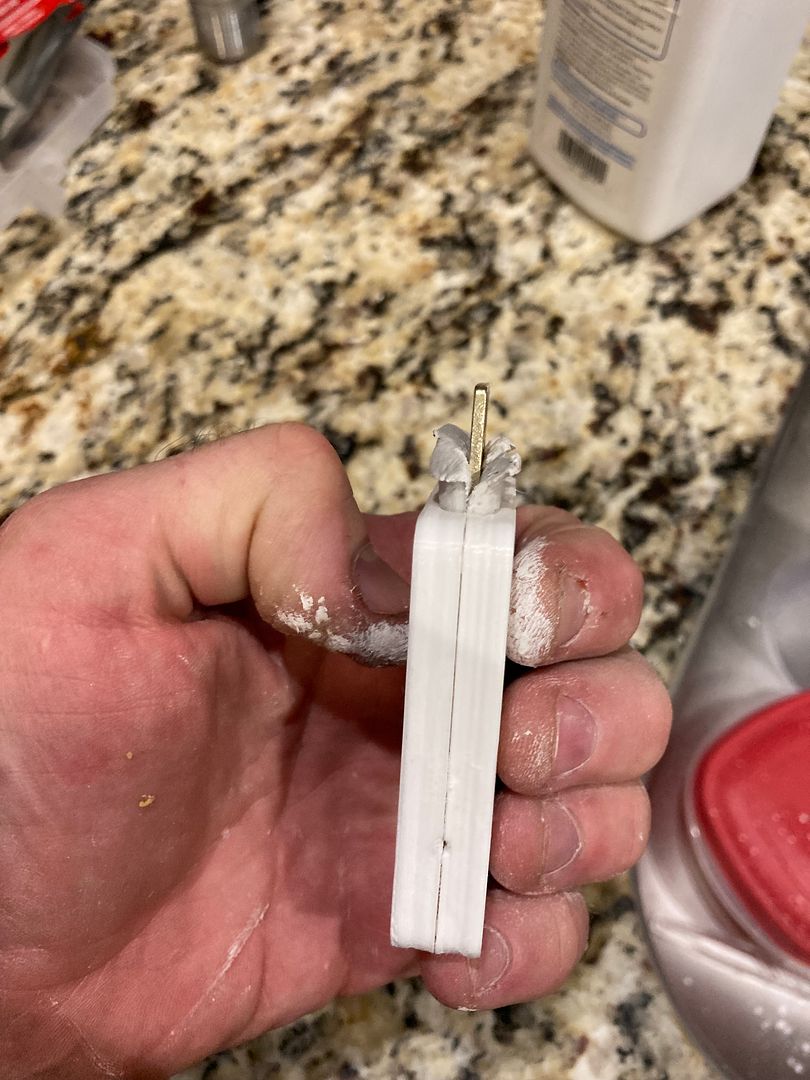
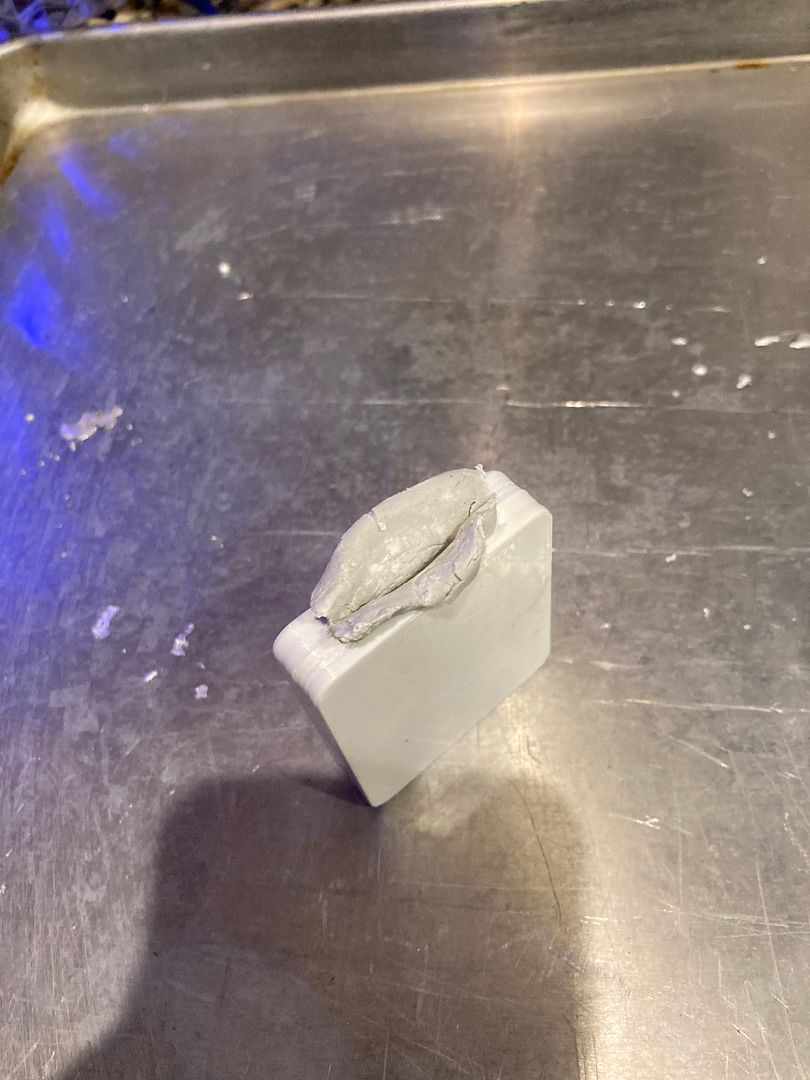
Yeah, clay squishes out around the key bow. But we can use that to our advantage! Use your finger to peel back the center of the squished out part on each side so it forms a funnel when the key is removed.

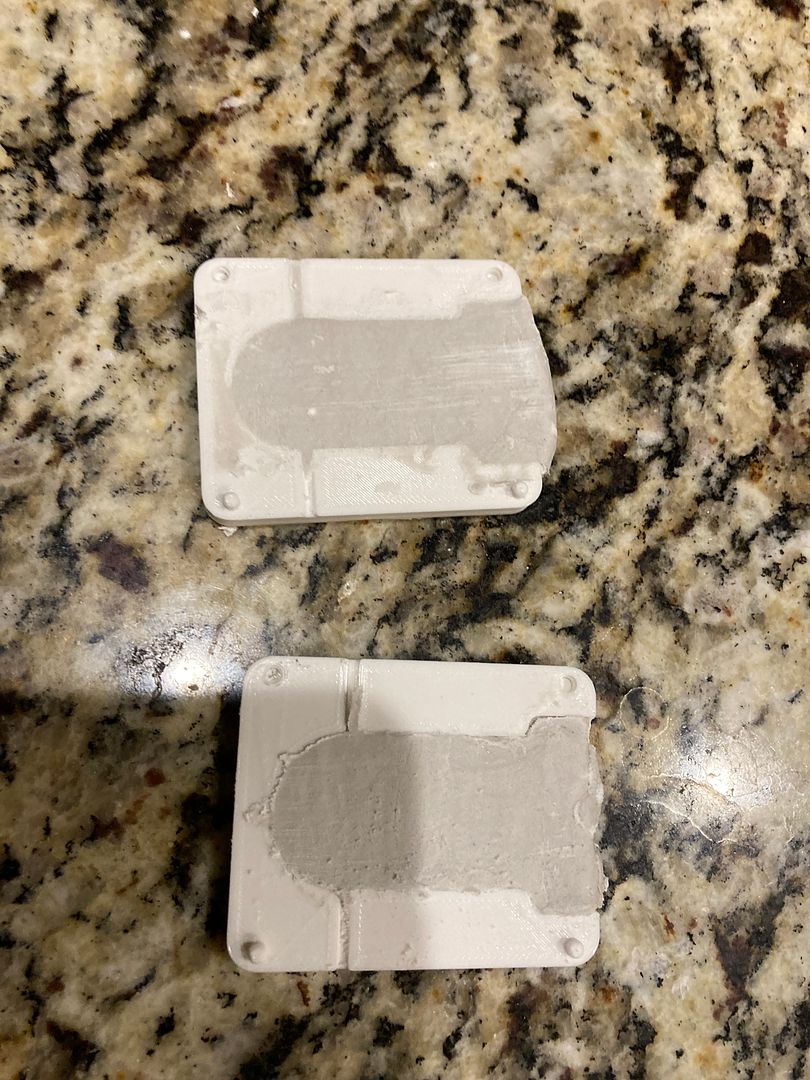
Now open the clamshell halves.
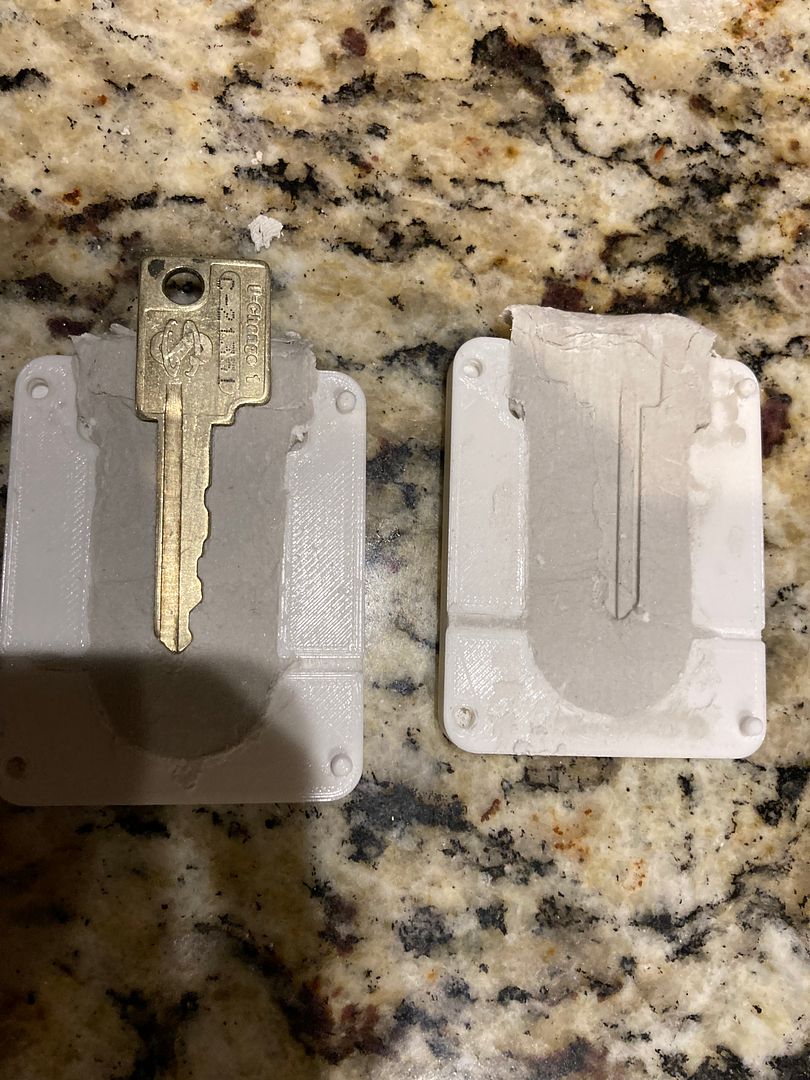
And remove the key
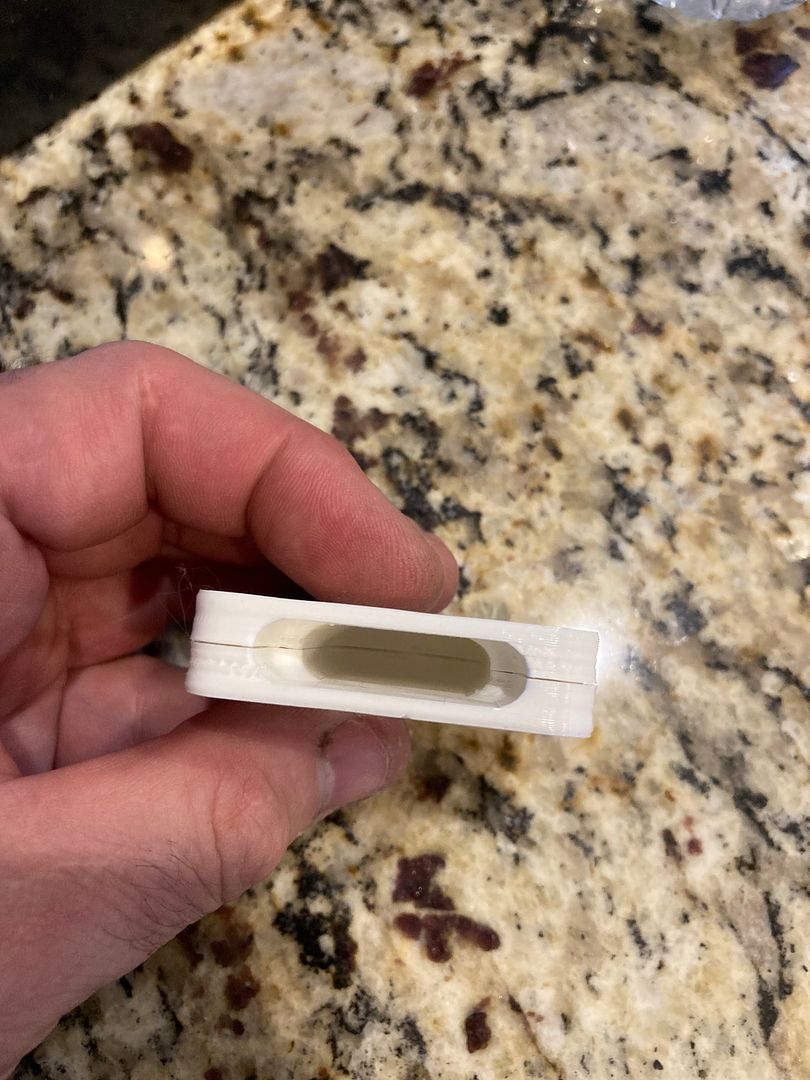
Now take a pick (because everybody here has one)
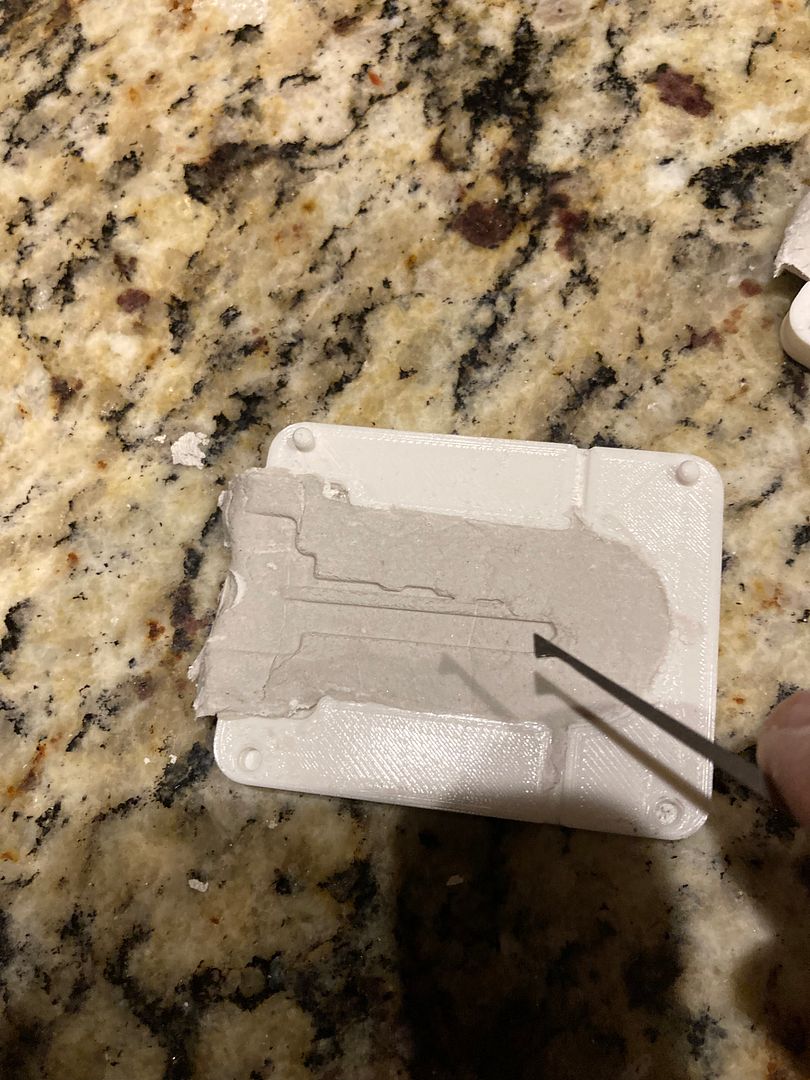
And drag it from near the tip of the cast of the key to the channels in the clamshell. This creates a sprue, and allows the air to be pushed out of the mold when the molten metal is poured in.
Close the clamshell and stand it so the funnel is at the top.
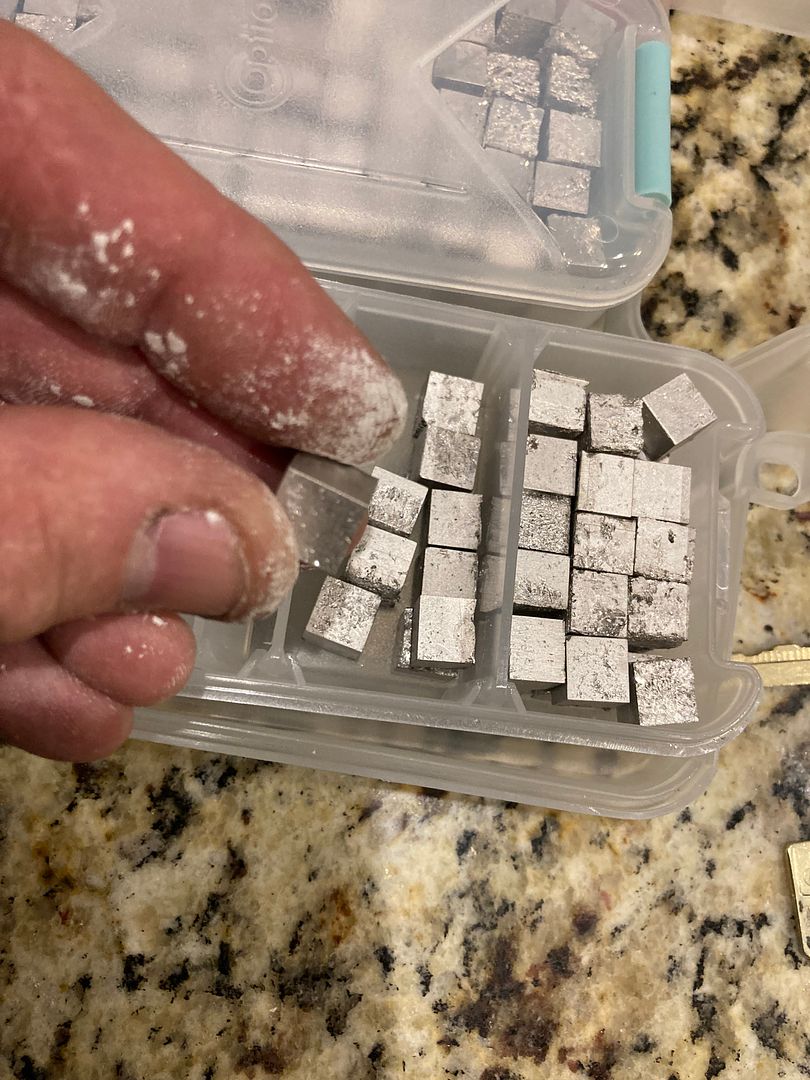
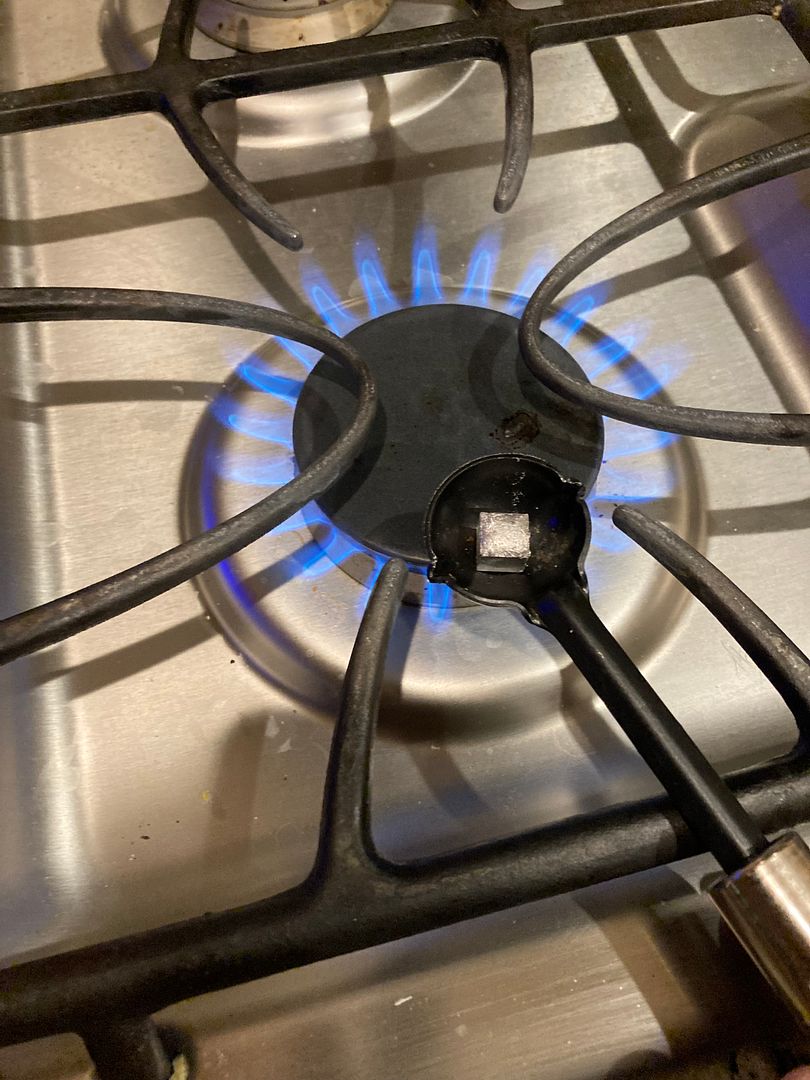
Now take a single cube (because it would be heartless to grab a married one)...
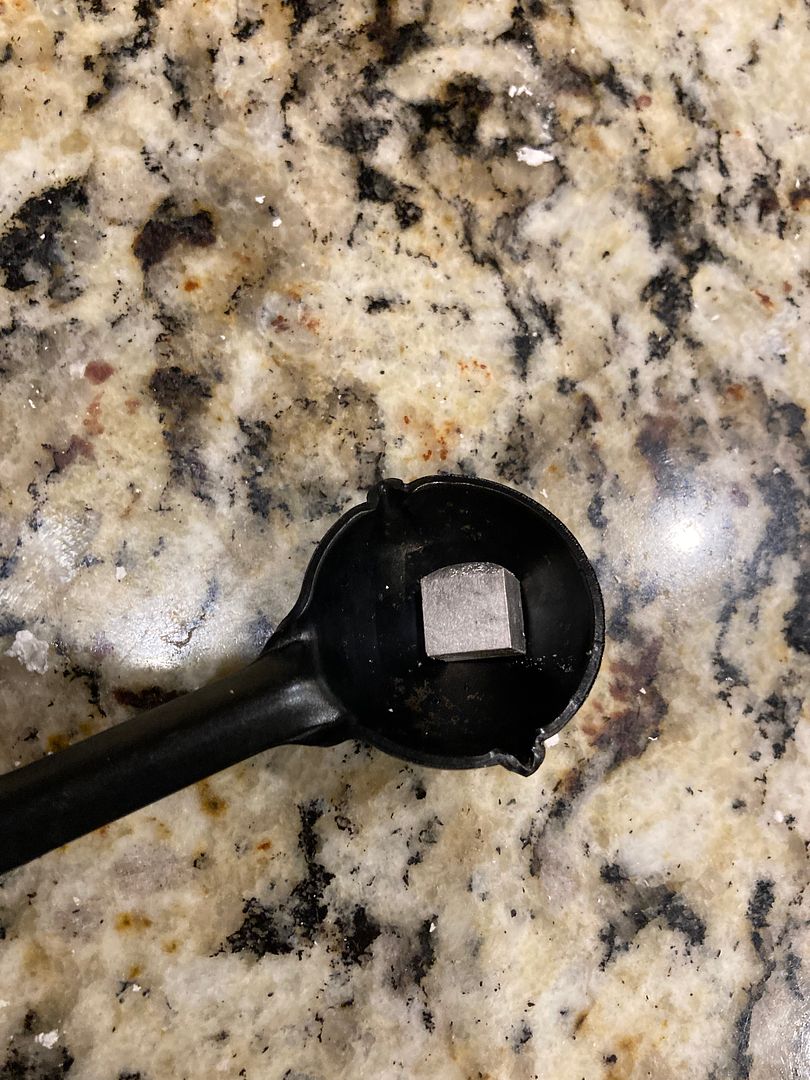
And put it into your casting ladle. This one is designed for casting bullets, so it is very small. You don't need much metal to cast a normal key.
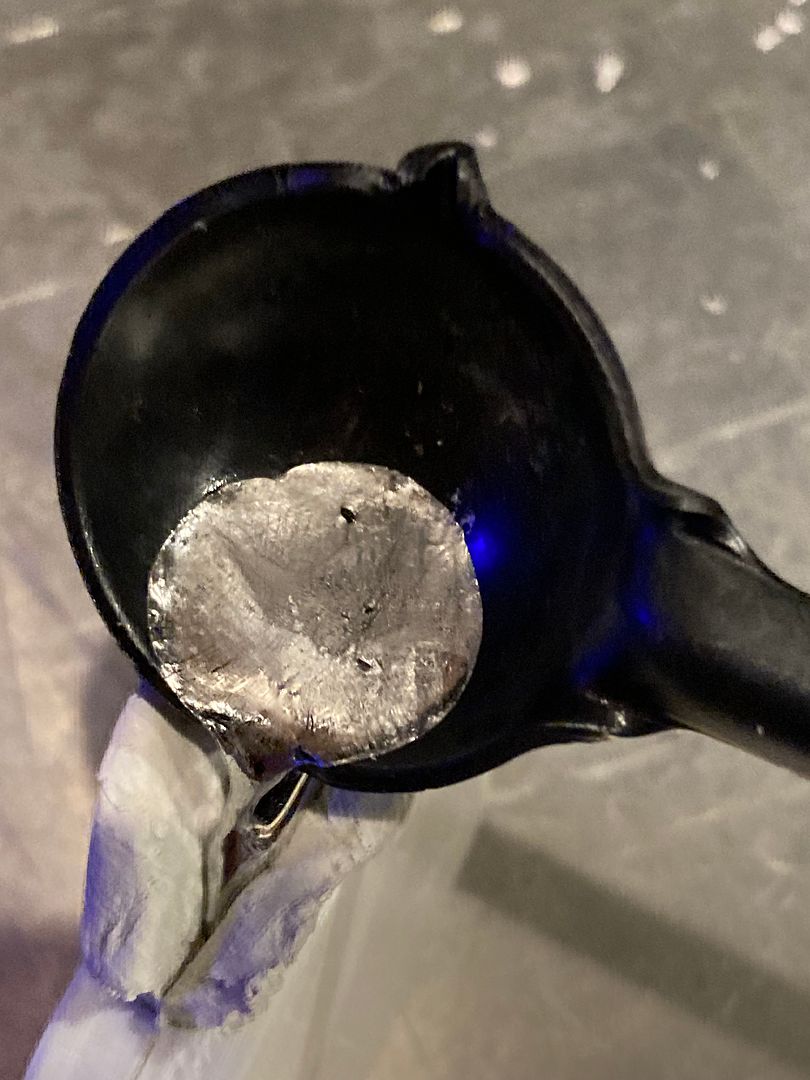
And melt it.
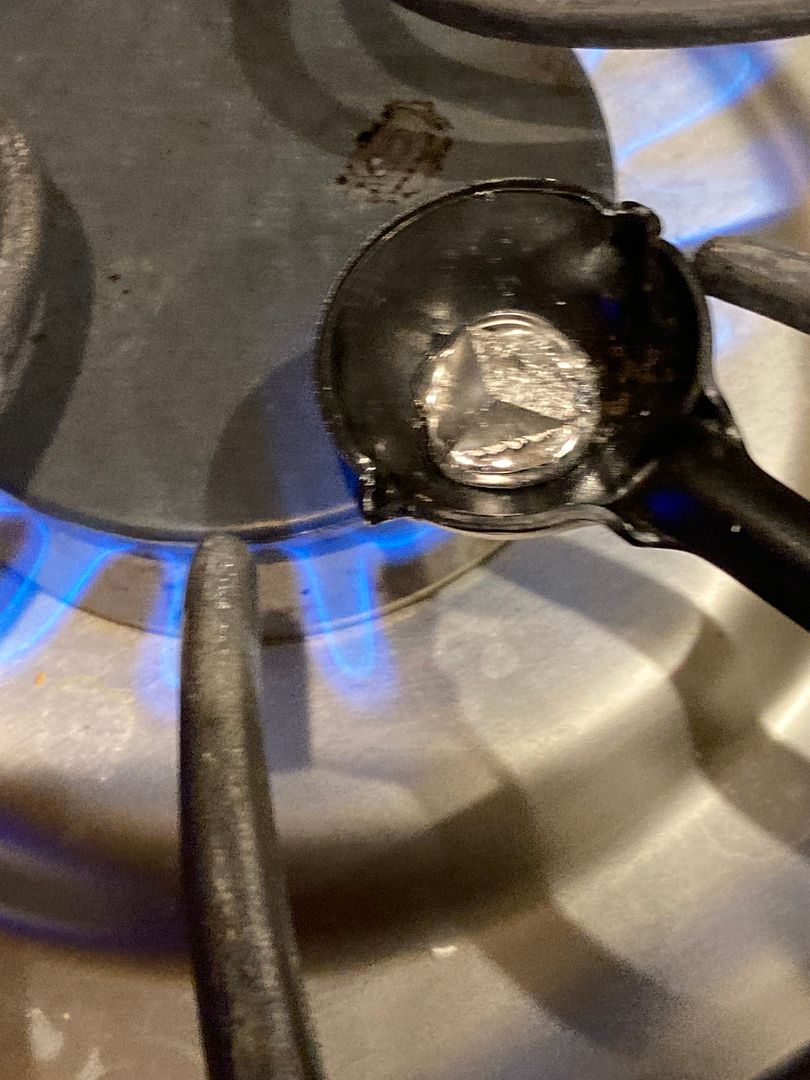
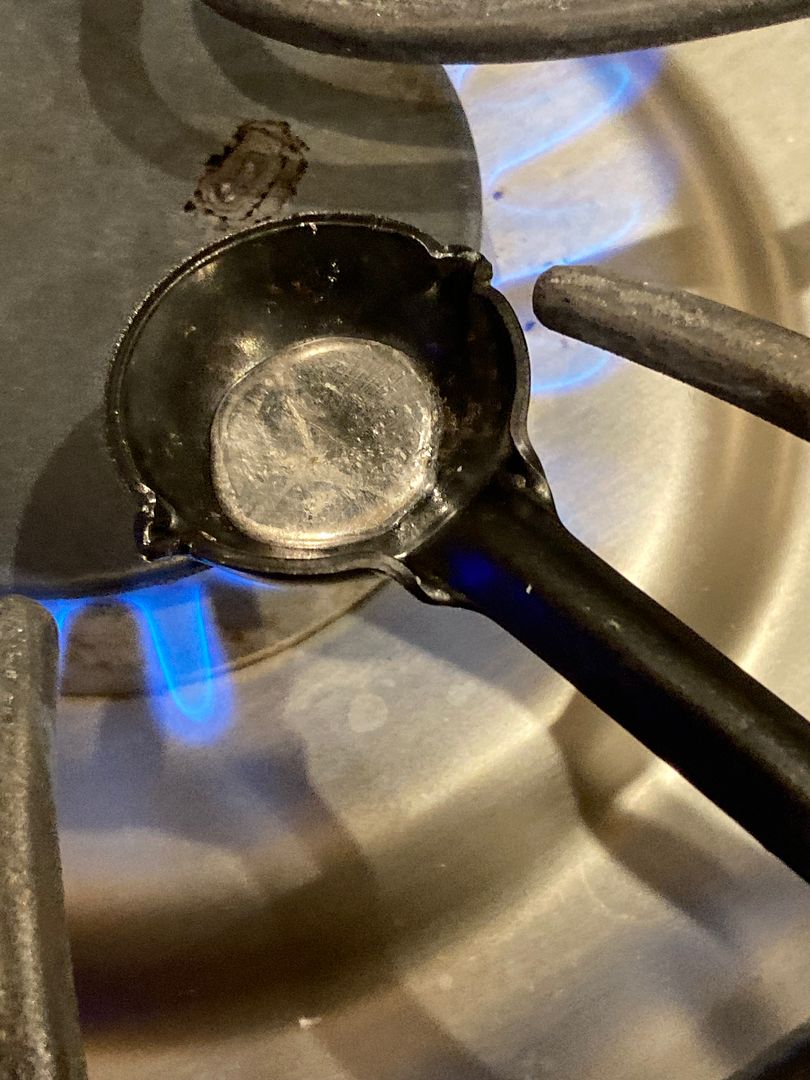
Once it is molten, pour it into your mold.
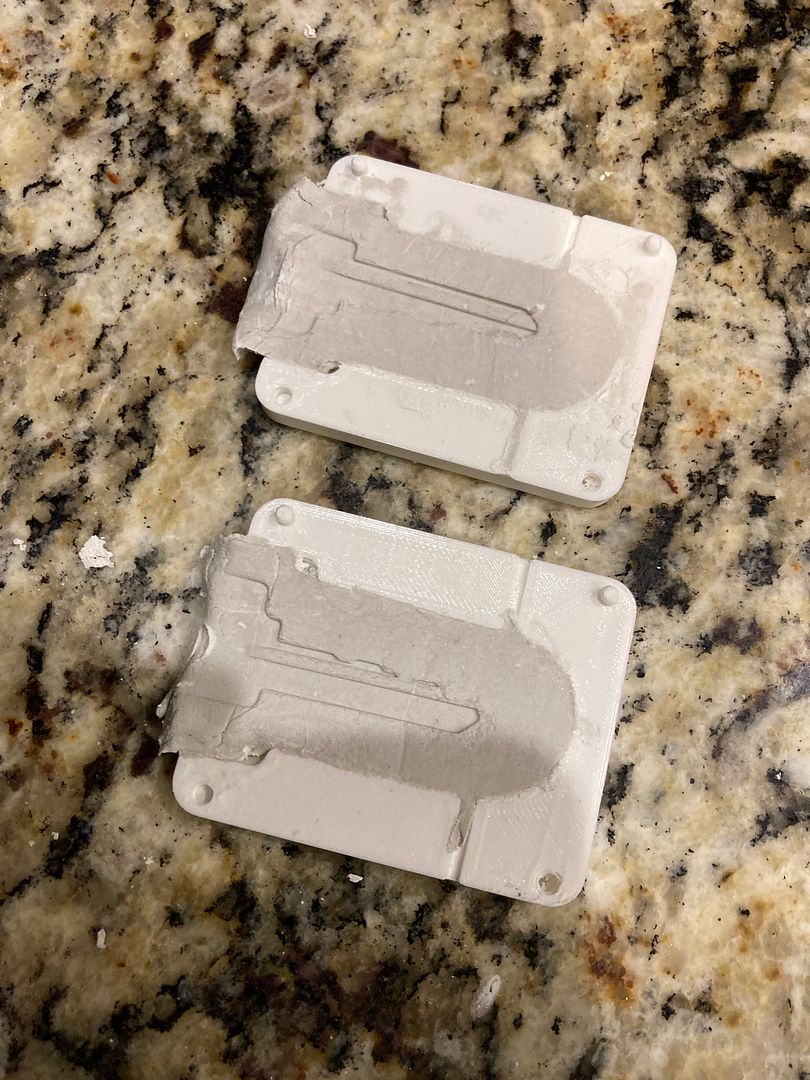
Now tap the clamshell onto the table gently a few times to be sure the metal reaches the bottom of the key mold. Then allow the assembly sit for 5-10 minutes to cool.
Now open the clamshell.
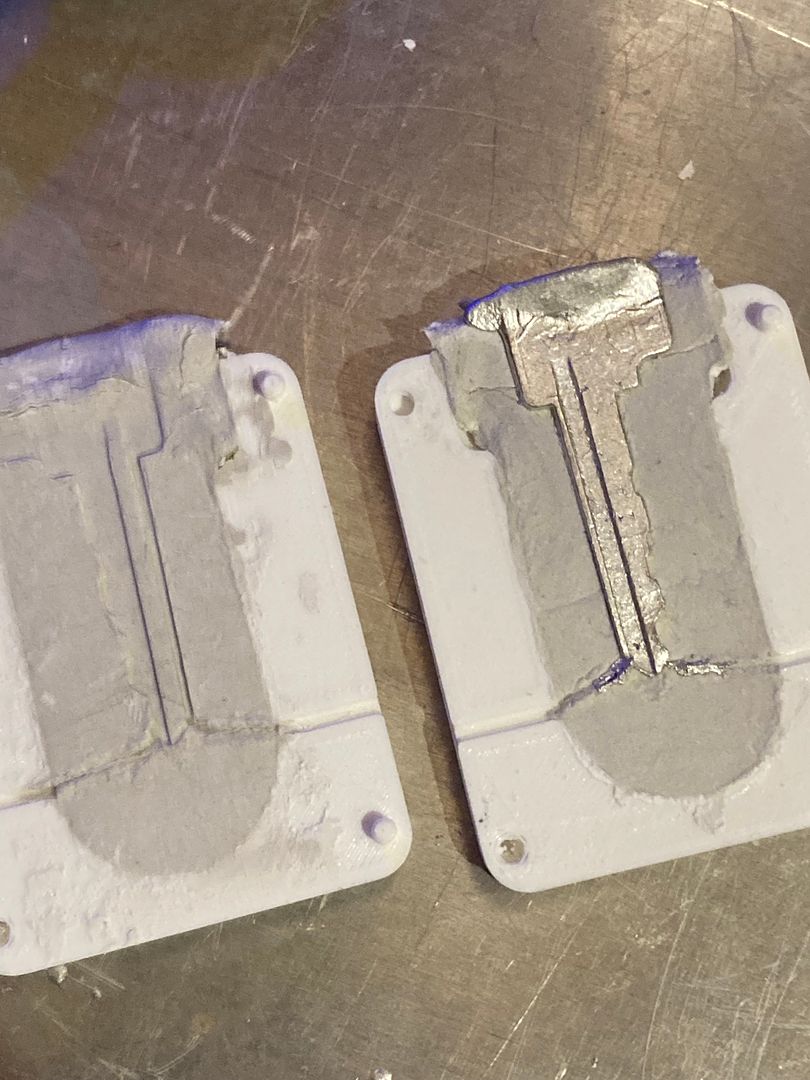
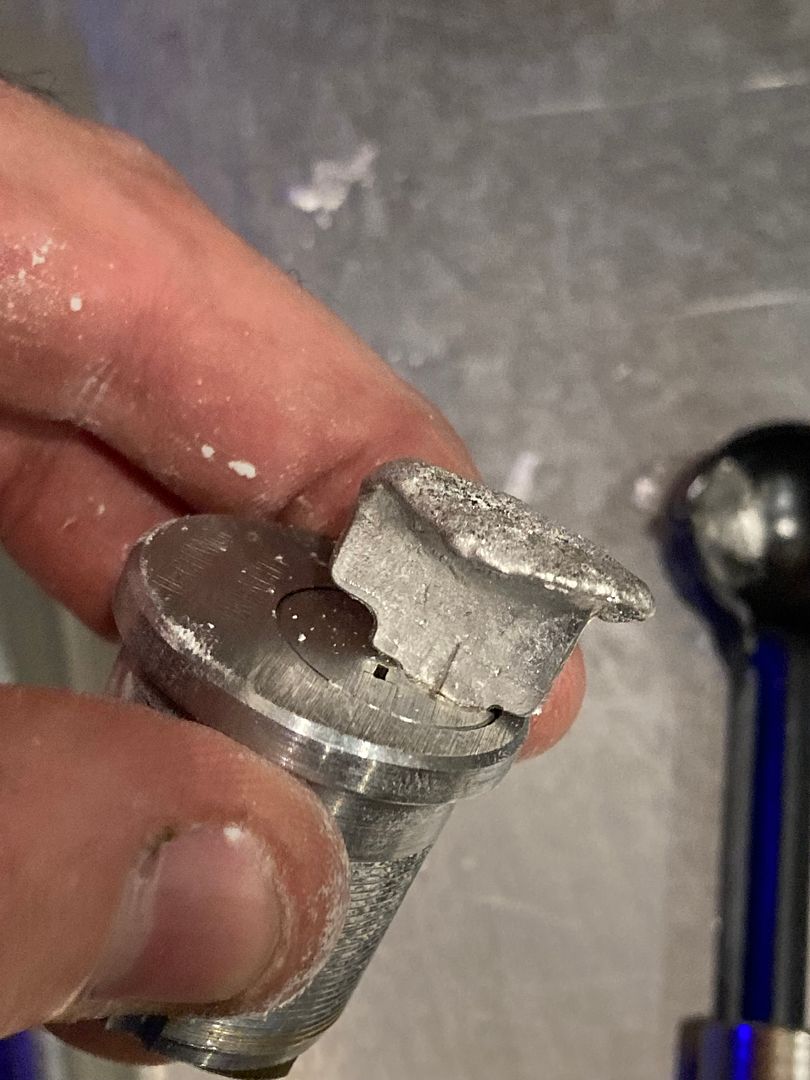
Whoa! Look at that! Well, take the key out of the mold. There will still be the two bits from the sprue channels.
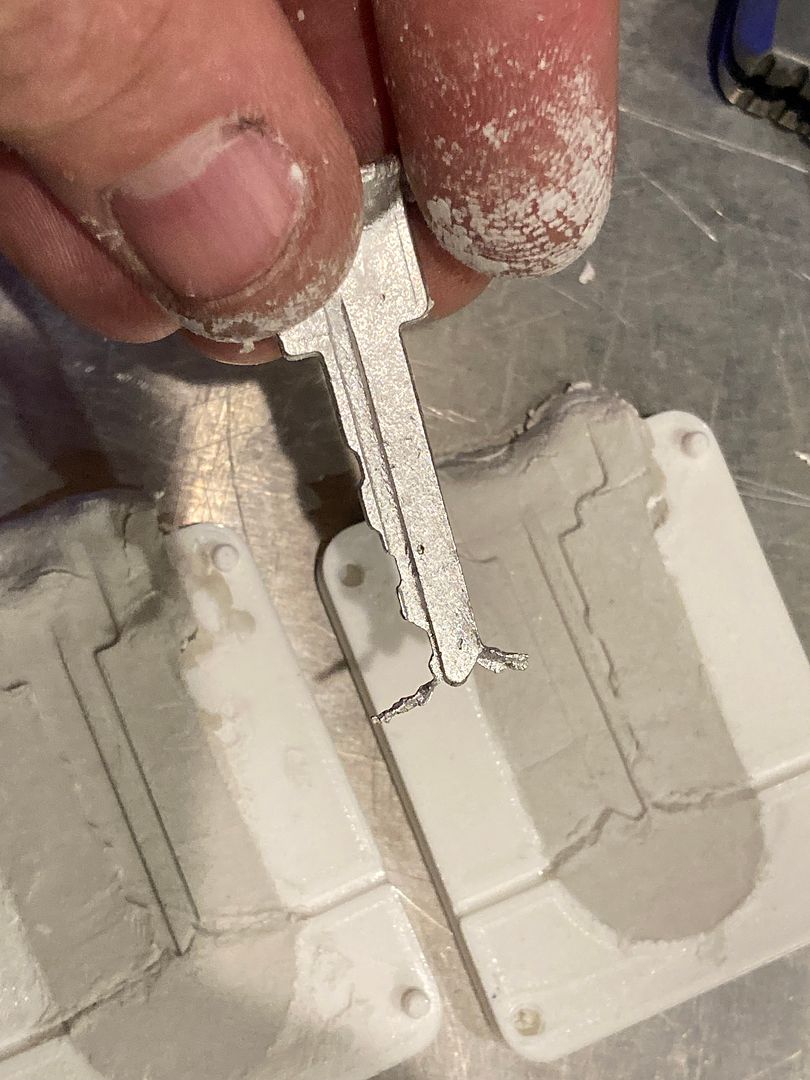
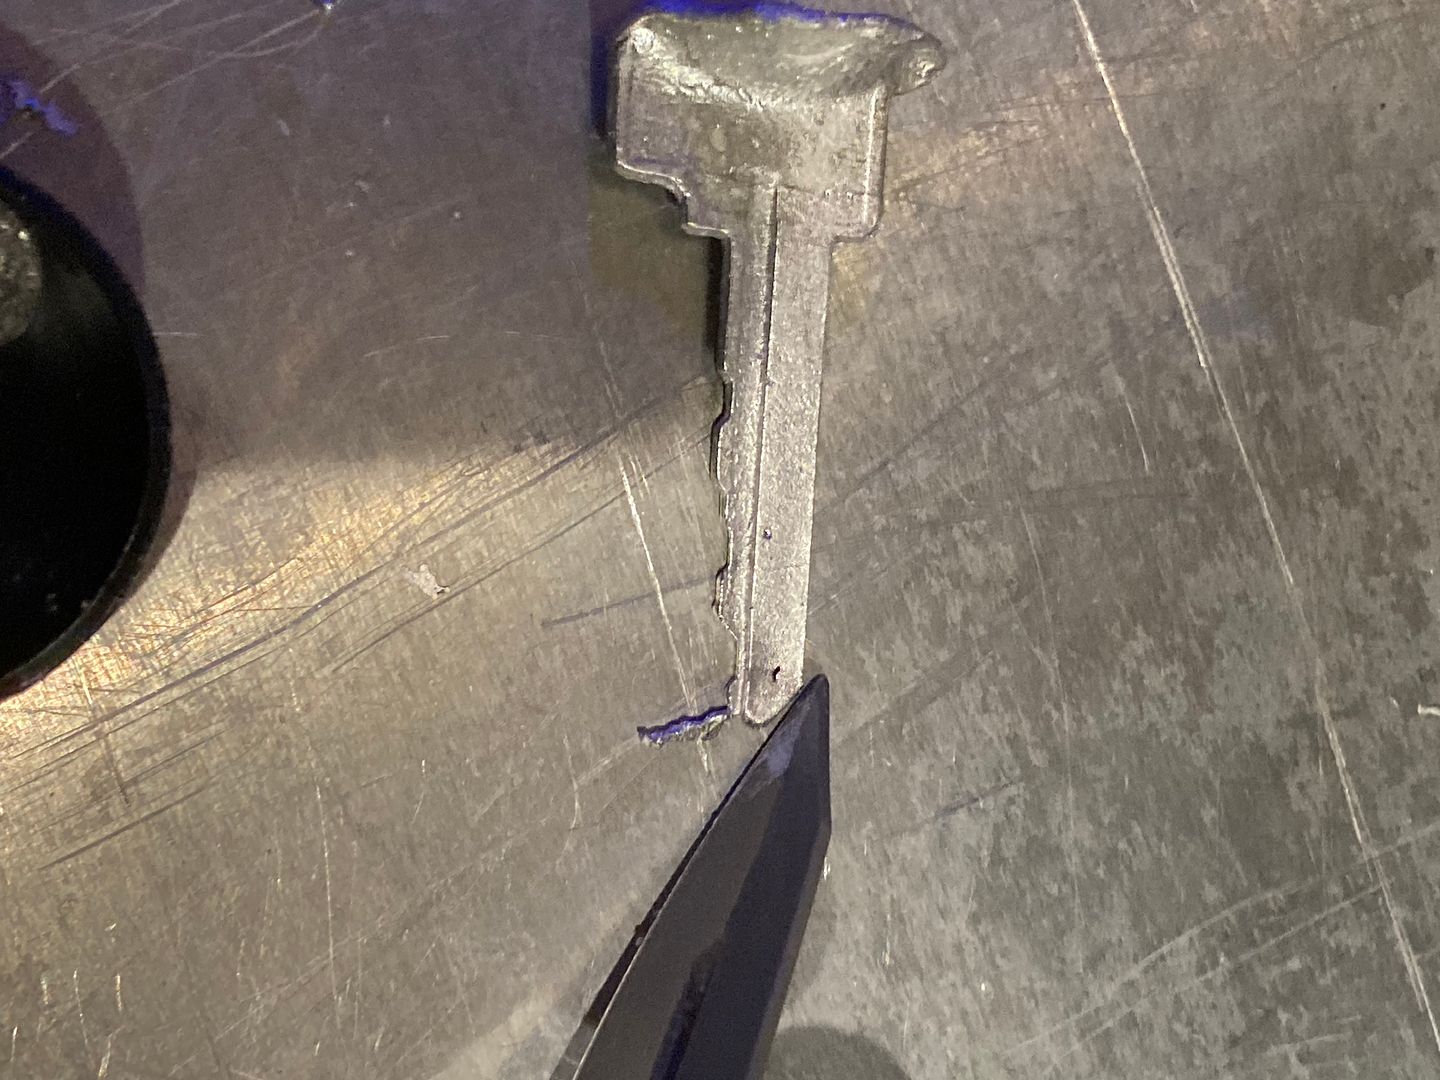
Place the casted key on a cutting board and use a knife to trim off the extra from the sprue channels. They will more break off than trim. The key is somewhat hard, though still far softer than brass.
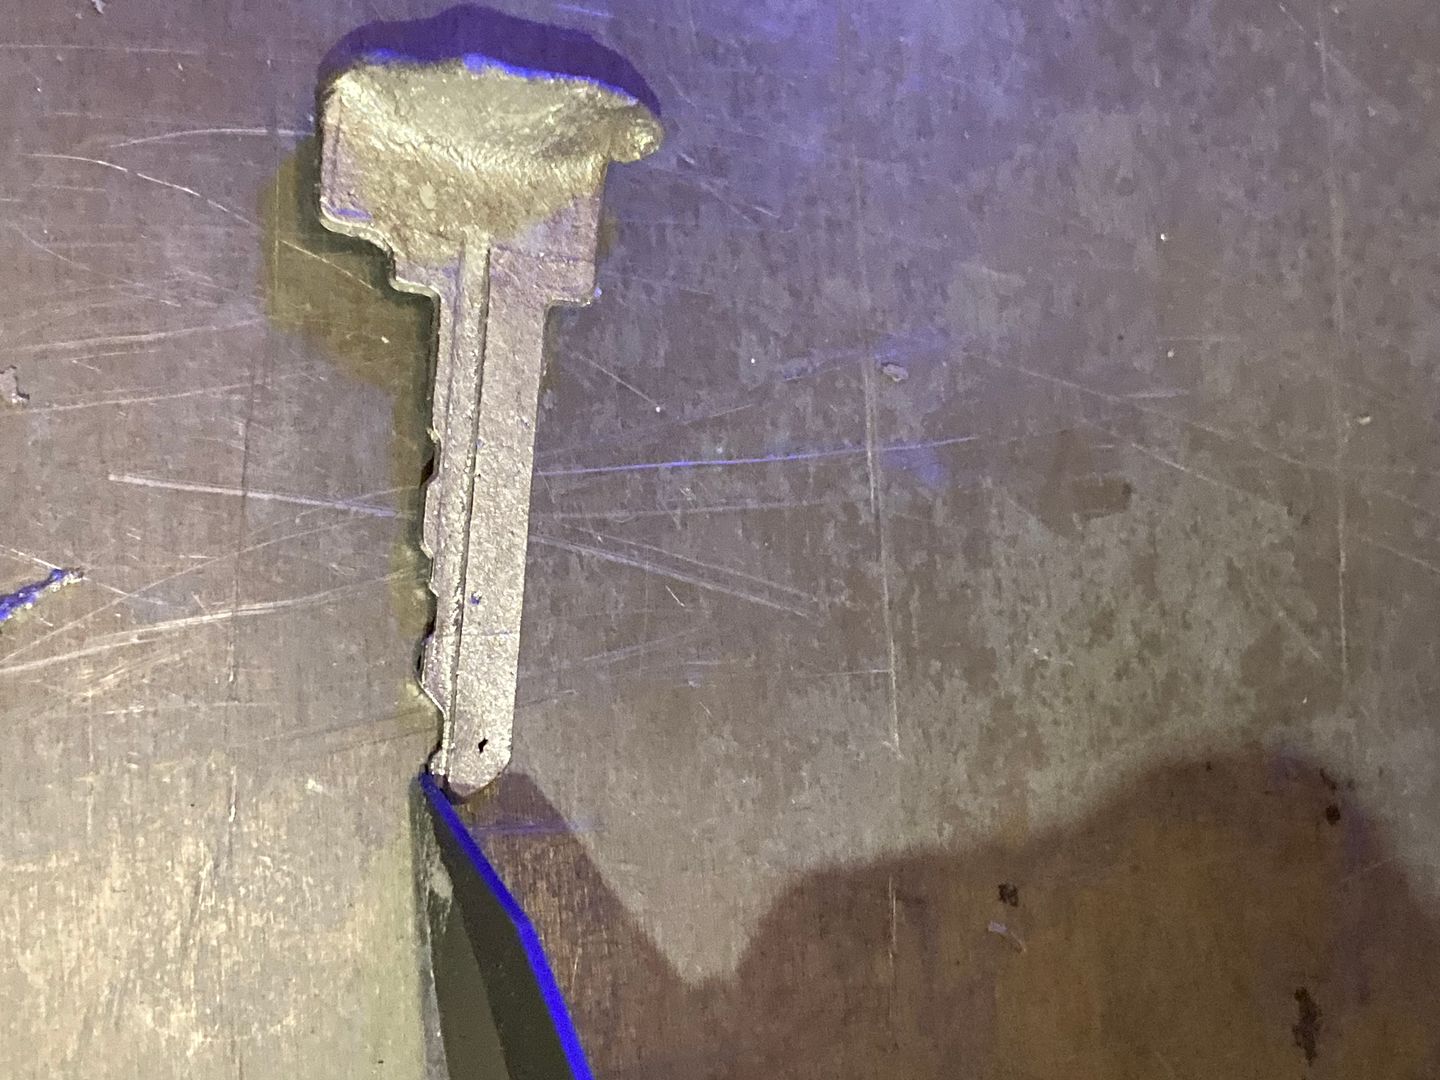
What comes next? Try the key out, of course. Be gentle, as the key can still be bent. Jiggle it a bit as needed.

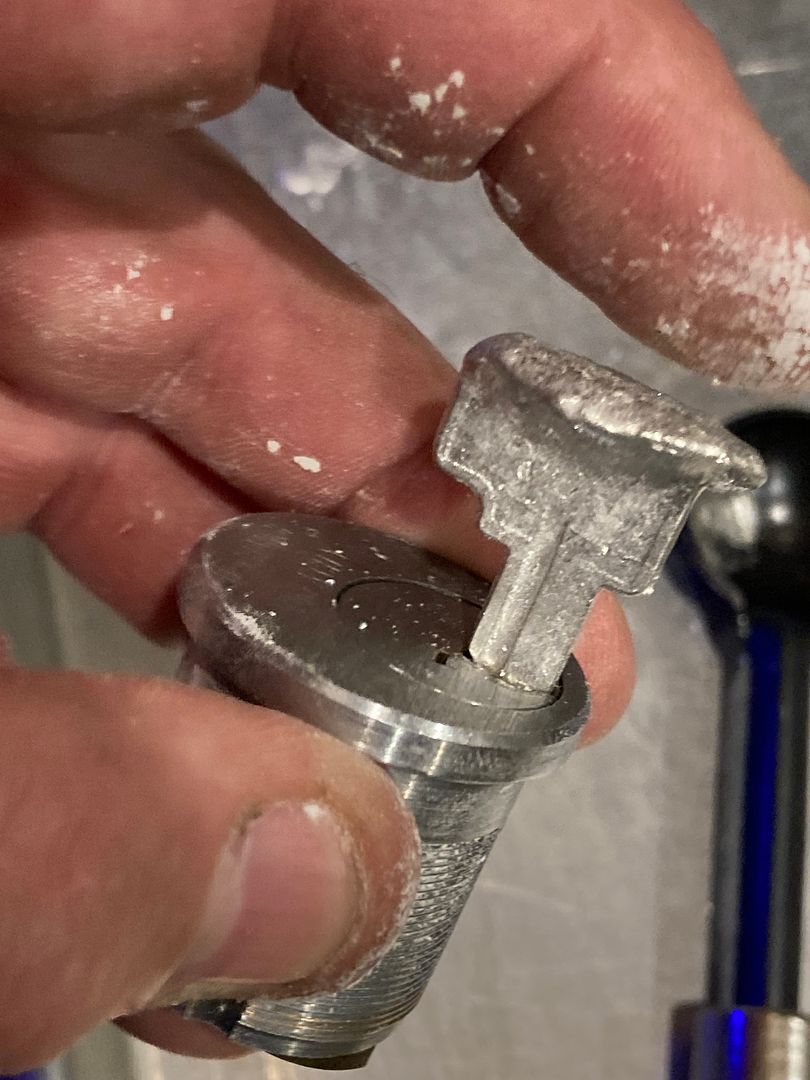
Well, it fits in the lock. Does it operate the lock?


To be honest, did not expect it to work perfectly the first time. But it did work. Going to keep this particular casted key for my collection as my first casted key.
Fin.
Gordon
Watched a few videos, and decided to make a kit. So here we go.
First, get some Woods metal. This is a bismuth alloy that melts at 158 degrees Fahrenheit (70 degrees Celsius). I also have some Rose's metal, which melts at (depending on the exact alloy blend) between 201-208 degrees Fahrenheit (about 94-98 C). Also get a silicone miniature ice cube tray. This makes cubes about 1 centimeter to a side. It is about perfect for casting a key for most normal size keys. The casted keys can always be melted down and reused again.
Go ahead a melt the woods metal into the tray. One tray, even though it is small, will hold about three pounds (1.36 kg) of woods metal.
While it is melting, you will need to use something to spread it around so all the cavities of the tray. Then pull it out of the oven and let the cubes cool to room temperature. Then you can pop the cubes out of the tray. I popped them out a little too early, so some of the cubes are a little course and a little of the metal stayed in the tray. Next time will be more patient. Though one tray is enough for LOTS of casted keys.
Then when they are cool, gather them up for later use. So much easier than trying to melt a large ingot for a single key!
Now we need a clamshell. Printed this one out from Thingiverse. Requires two of them.
Put the two halves together.
Not ready for use yet. Now fill the halves of the clamshell with clay. I used the handle of the ladle (you will see that soon) to roll the clay flat in the clamshell. Then dust it with baby powder (talc) and use a light brush to carefully brush the dust off so only a little is there to keep the clay from sticking to the key.
Time for a key! Grabbed the first keyed cylinder to hand, which happened to be a U-Change.
Place it on the clay of one half of the clamshell. You can press it lightly into the clay, but I didn't.
Place the other half of the clamshell on top...
And press the clamshell closed.
Yeah, clay squishes out around the key bow. But we can use that to our advantage! Use your finger to peel back the center of the squished out part on each side so it forms a funnel when the key is removed.
Now open the clamshell halves.
And remove the key
Now take a pick (because everybody here has one)
And drag it from near the tip of the cast of the key to the channels in the clamshell. This creates a sprue, and allows the air to be pushed out of the mold when the molten metal is poured in.
Close the clamshell and stand it so the funnel is at the top.
Now take a single cube (because it would be heartless to grab a married one)...
And put it into your casting ladle. This one is designed for casting bullets, so it is very small. You don't need much metal to cast a normal key.
And melt it.
Once it is molten, pour it into your mold.
Now tap the clamshell onto the table gently a few times to be sure the metal reaches the bottom of the key mold. Then allow the assembly sit for 5-10 minutes to cool.
Now open the clamshell.
Whoa! Look at that! Well, take the key out of the mold. There will still be the two bits from the sprue channels.
Place the casted key on a cutting board and use a knife to trim off the extra from the sprue channels. They will more break off than trim. The key is somewhat hard, though still far softer than brass.
What comes next? Try the key out, of course. Be gentle, as the key can still be bent. Jiggle it a bit as needed.
Well, it fits in the lock. Does it operate the lock?
To be honest, did not expect it to work perfectly the first time. But it did work. Going to keep this particular casted key for my collection as my first casted key.
Fin.
Gordon
Last edited by GWiens2001 on Mon Jul 18, 2022 4:36 pm, edited 1 time in total.
Just when you think you've learned it all, that is when you find you haven't learned anything yet.